
Changing Objects in Videos
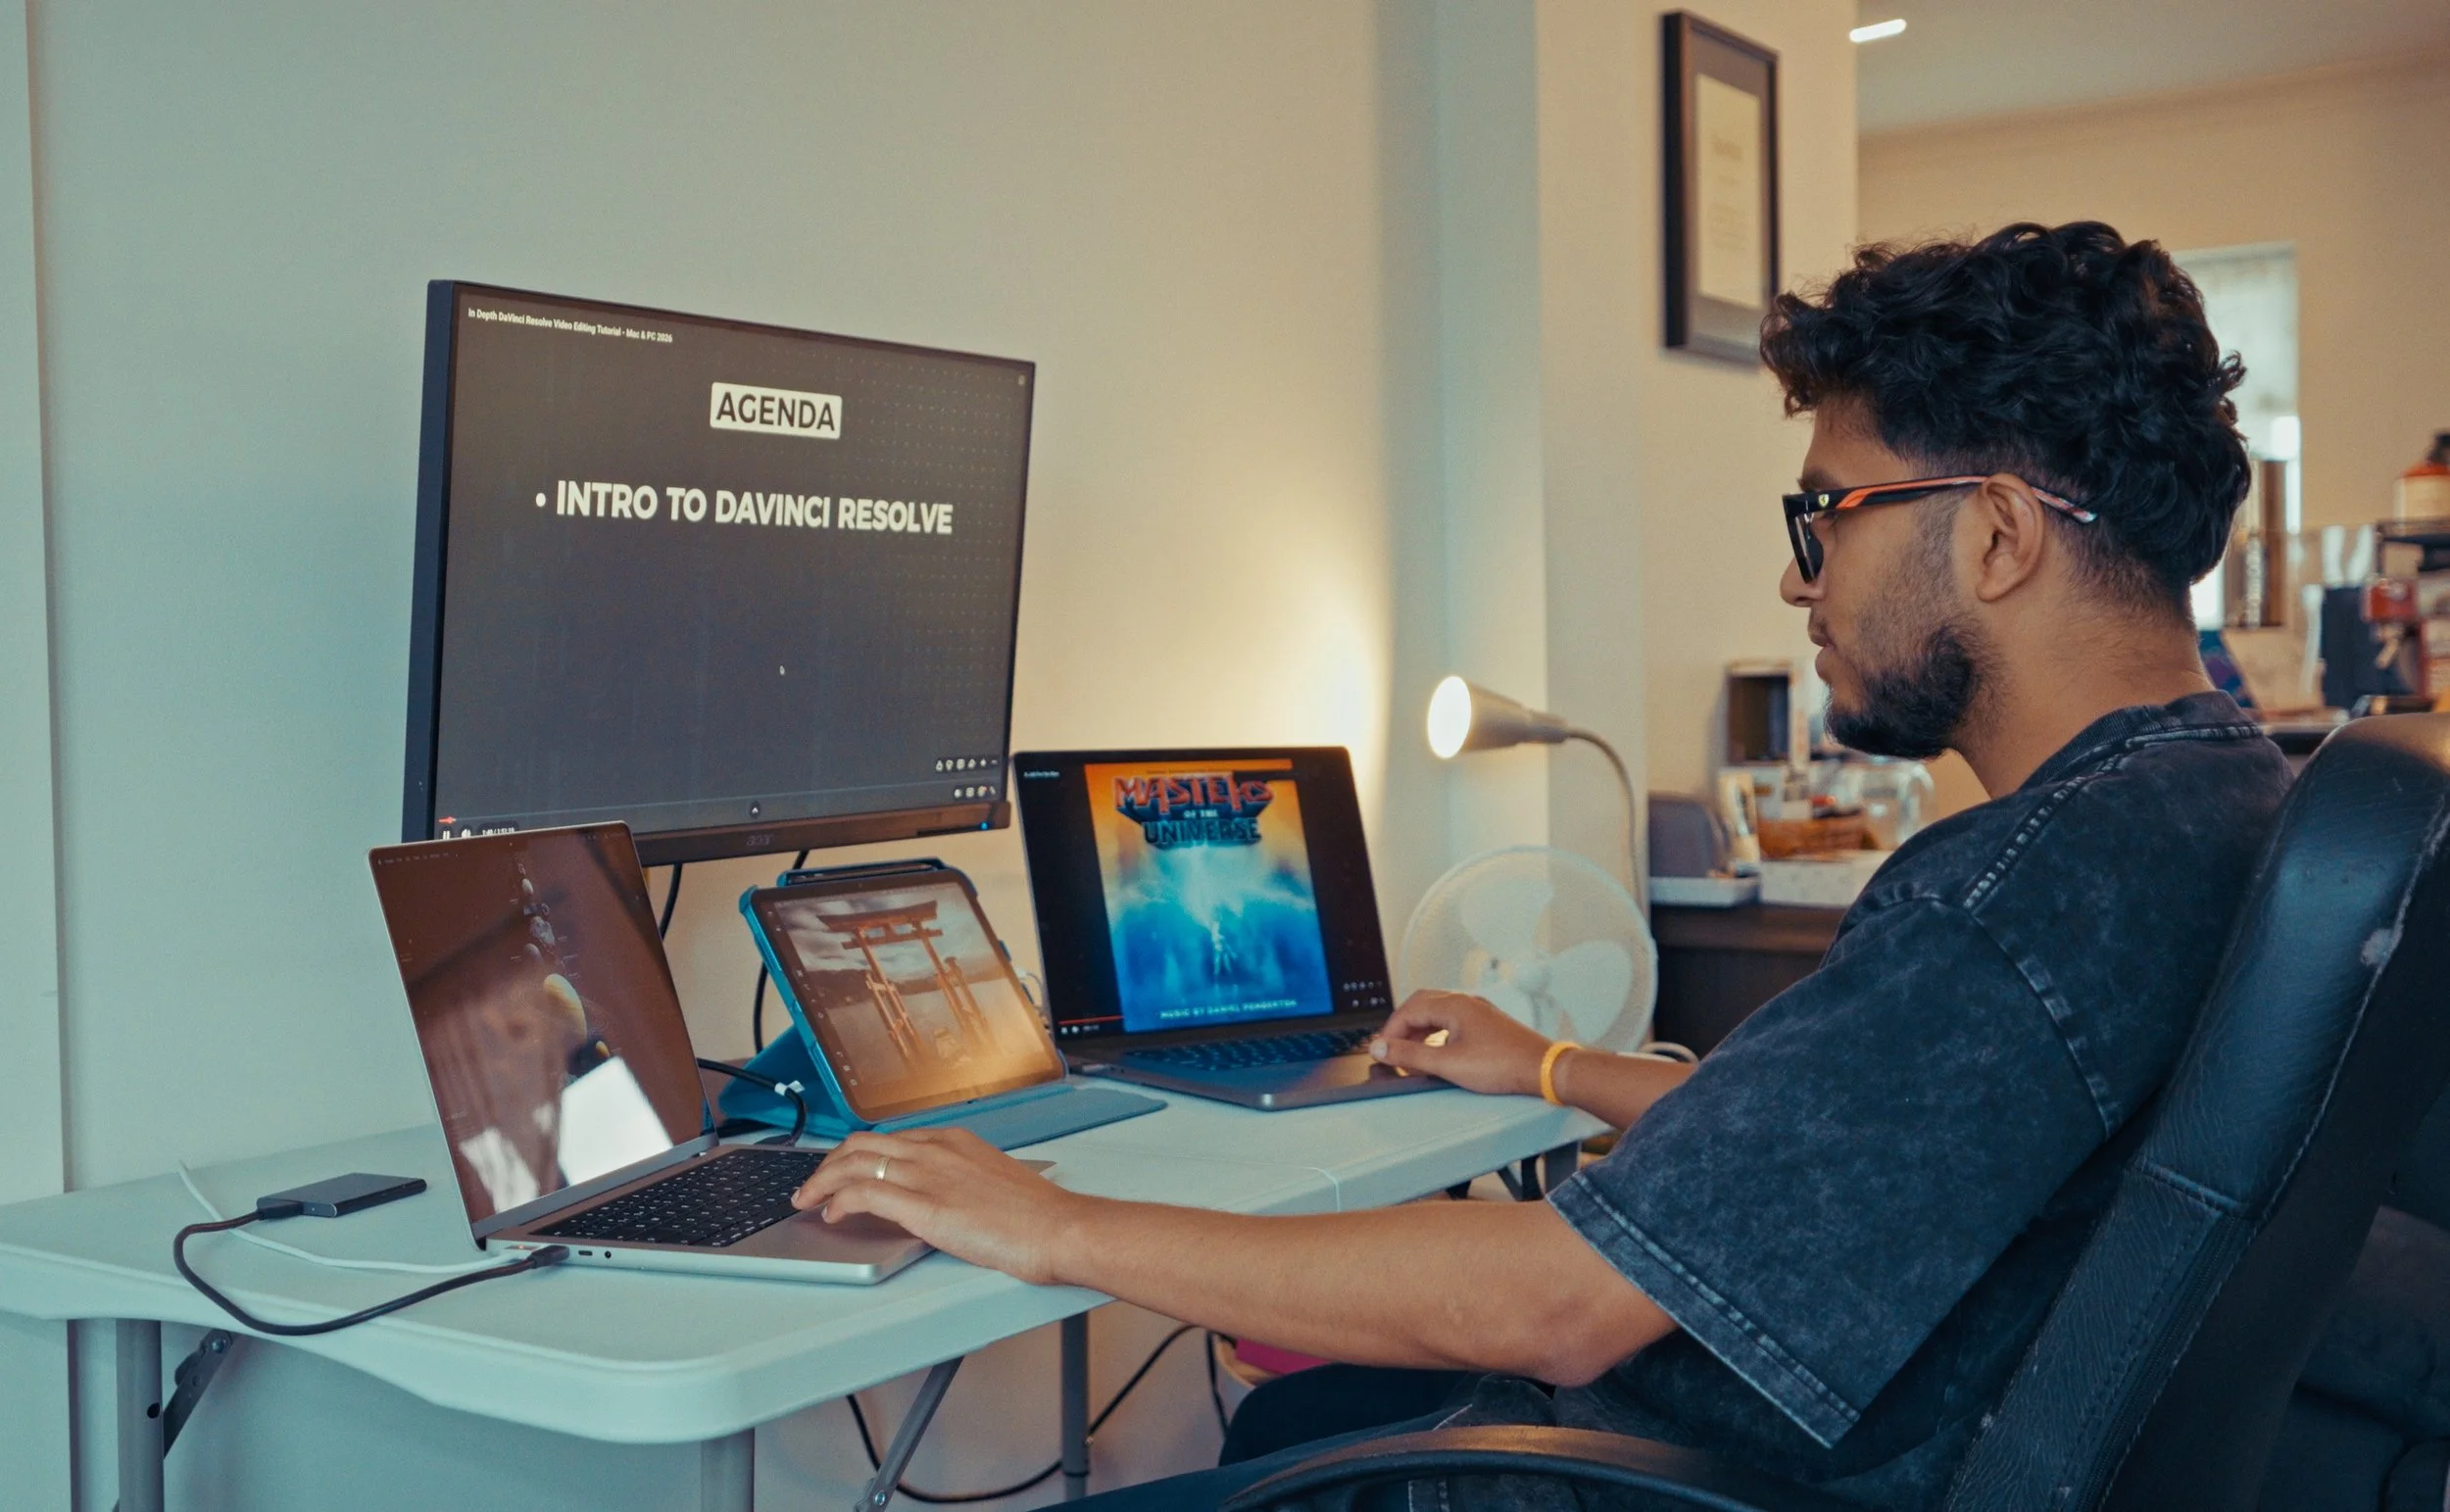
This is a simple workflow for changing an object in your video while keeping the rest of the scene the same. In this example, I filmed myself working on a laptop and changed the laptop into an old 90s computer setup.
Tools Needed
Higgsfield.ai
Nano Banana Pro
Kling 3.0
Editing Software
Step 1: Film a Simple B-Roll Shot
Start by filming a simple b-roll clip.
For my example, I filmed myself working on my laptop at a desk.
Try to keep the shot clean and simple. The easier the scene is to understand, the better the AI result will usually be.
Step 2: Export a Still Image From the Video
Take your video into your editing software and export a single frame from the clip.
This image will be used as the reference image for changing the object.
In my case, I exported a frame where I was clearly working on the laptop.
Step 3: Take the Image Into Nano Banana Pro
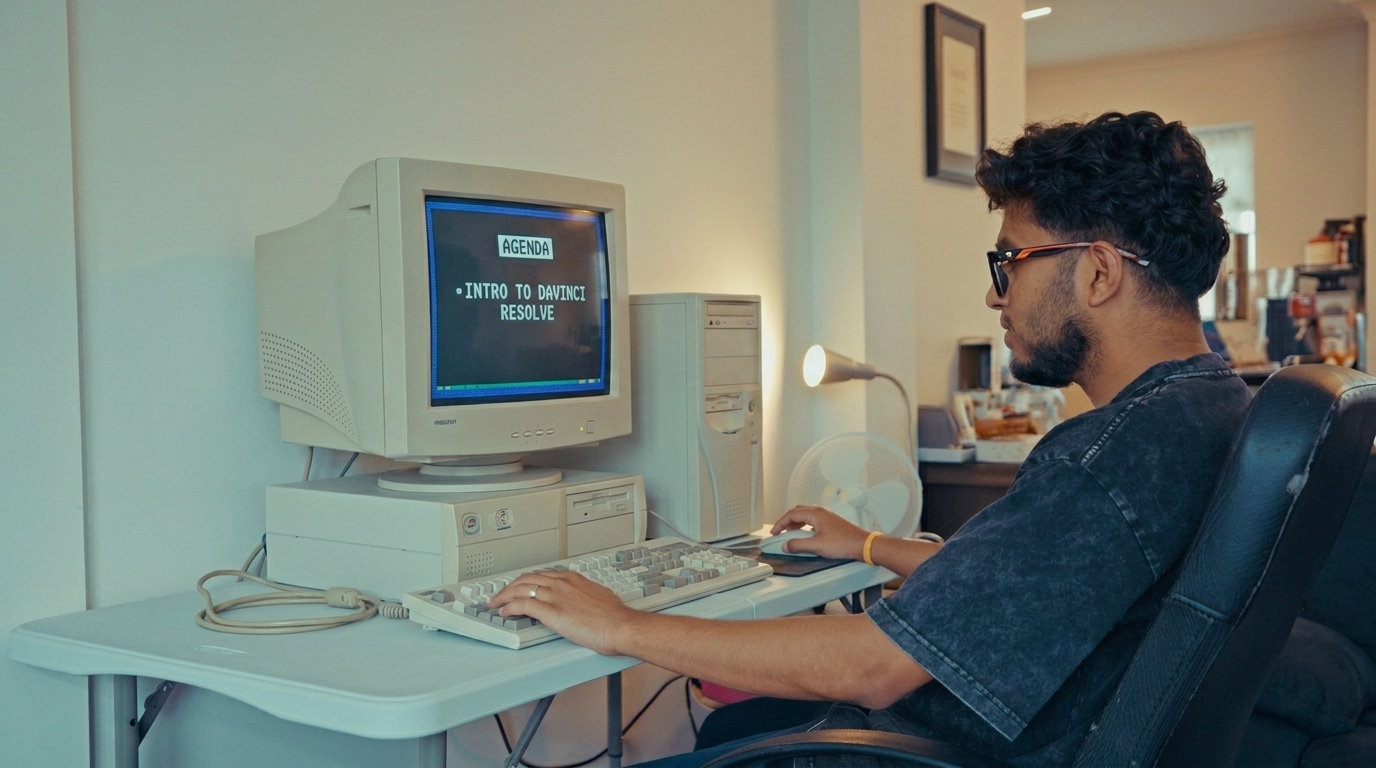
Upload the exported image into Nano Banana Pro on Higgsfield AI.
Now write a prompt that tells the AI exactly what object you want to change, while also telling it to keep everything else the same.
Use this prompt:
Prompt:
“The computer in this image is an old computer setup from the 90s. The person is working on this old setup. Everything else remains the same.”
This should change the laptop into an older computer setup while keeping the person, room, lighting, and overall scene consistent.
Step 4: Create a Second Angle
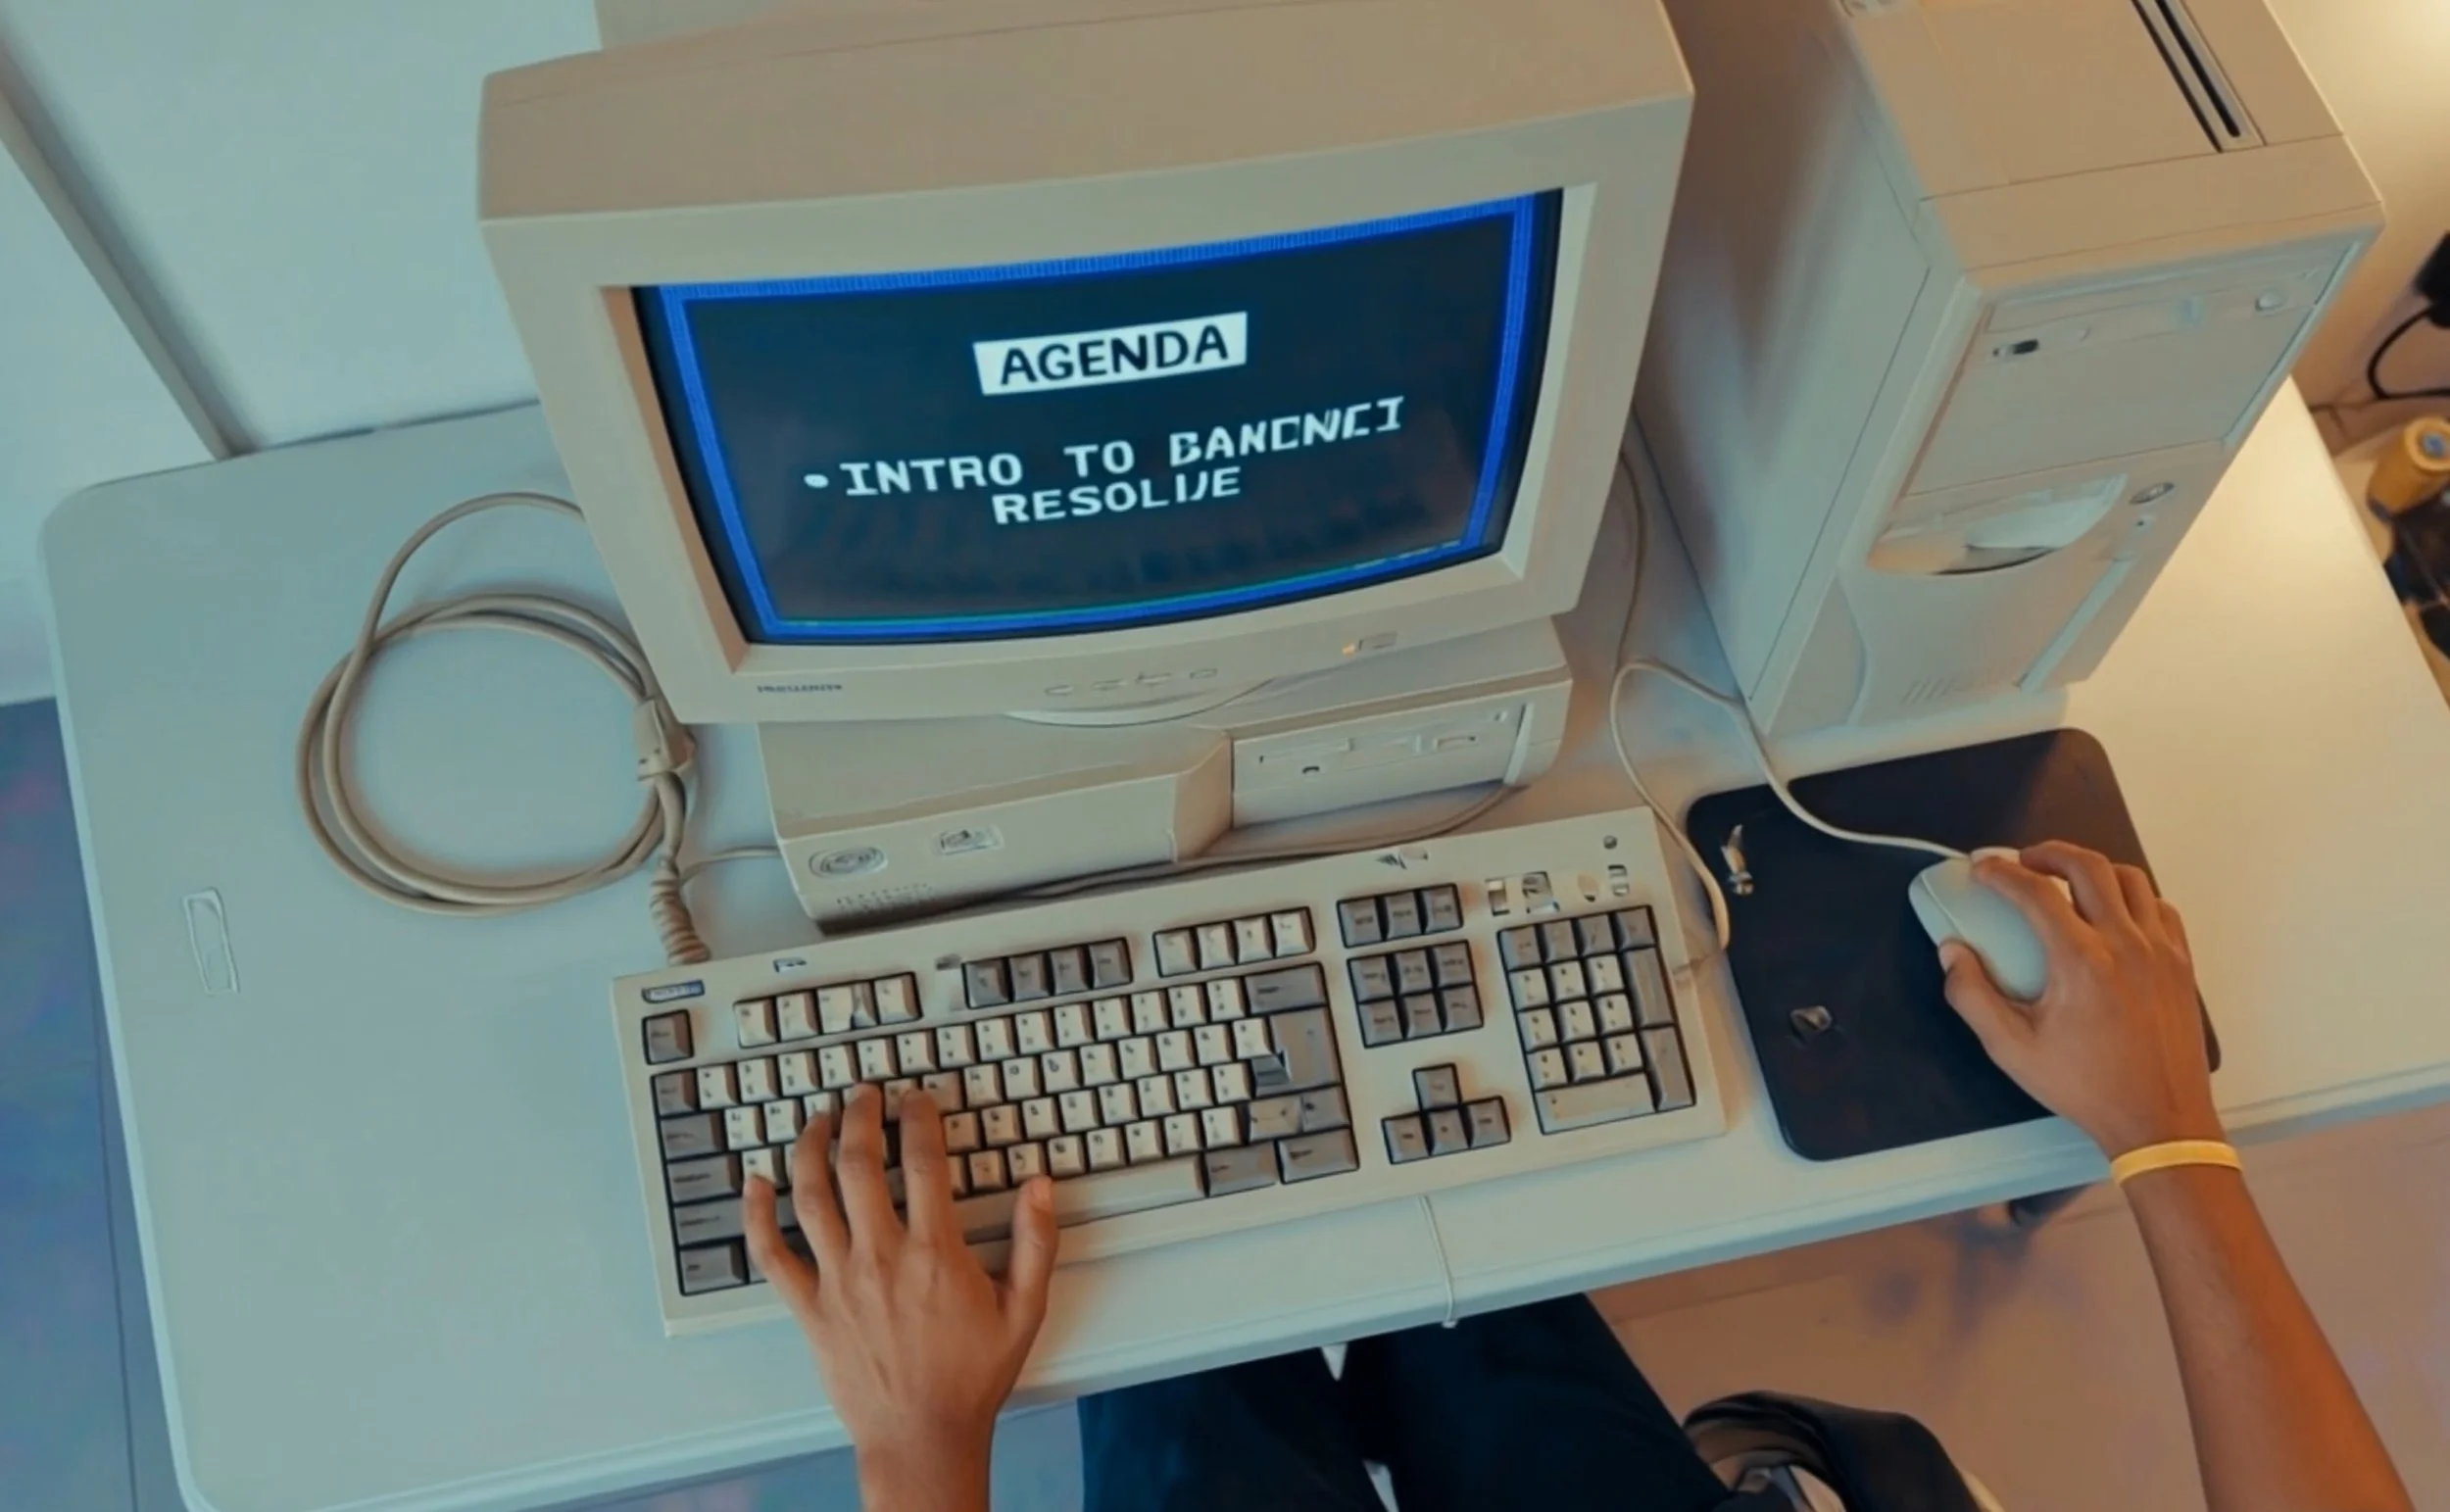
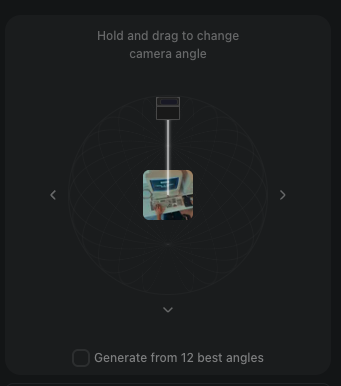
Inside Higgsfield, you can also create a new camera angle.
Click the Angles option, then adjust the camera to create a new view of the same scene.
For example, you can shift the camera into a top-down angle so it looks like the shot was captured from above.
This gives you a second image that matches the scene but has a different camera perspective.
Step 5: Animate the Images in Kling 3.0
Once you have your generated images, take them into Kling 3.0.
Run two separate generations, one for each image, and add a subtle camera movement.
Use this prompt:
Prompt:
“A slow camera zoom as the man is working.”
This adds a light, natural camera movement so the image feels more like a real video shot.
Optional Step: Create a Camera Movement Between the Two Shots
If you want to create a transition between the original angle and the top-down angle, use both images in Kling 3.0.
Set the first image as the start frame and the second image as the end frame.
Then use this prompt:
Prompt:
“The man is working in frame one while the camera does a smooth movement to land on an overhead shot like in the end frame. Do not change anything about the subject or the surroundings.”
This creates a camera move from the first shot into the overhead shot, while keeping the subject and environment consistent.
Extra Tips
Keep your original video simple.
Use clear prompts that explain exactly what should change.
Always include instructions like “everything else remains the same.”
If the AI changes the person, room, lighting, or background too much, rerun the generation with a stricter prompt.
Subtle movement usually looks more realistic than extreme motion.
Use start and end frames when you want more control over the camera movement.
Happy creating!